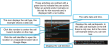
GATA panel
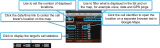
The map view's GATA (Gladiator Automated Target Acquisition) panel is opened by clicking  on the left of the map.
The GATA panel consists of a Current activities tab, Locations Info tab, Associates Info tab and individual field unit tabs for all the selected case's active GATA field units. There are also buttons that allow you to configure your GATA view.
-
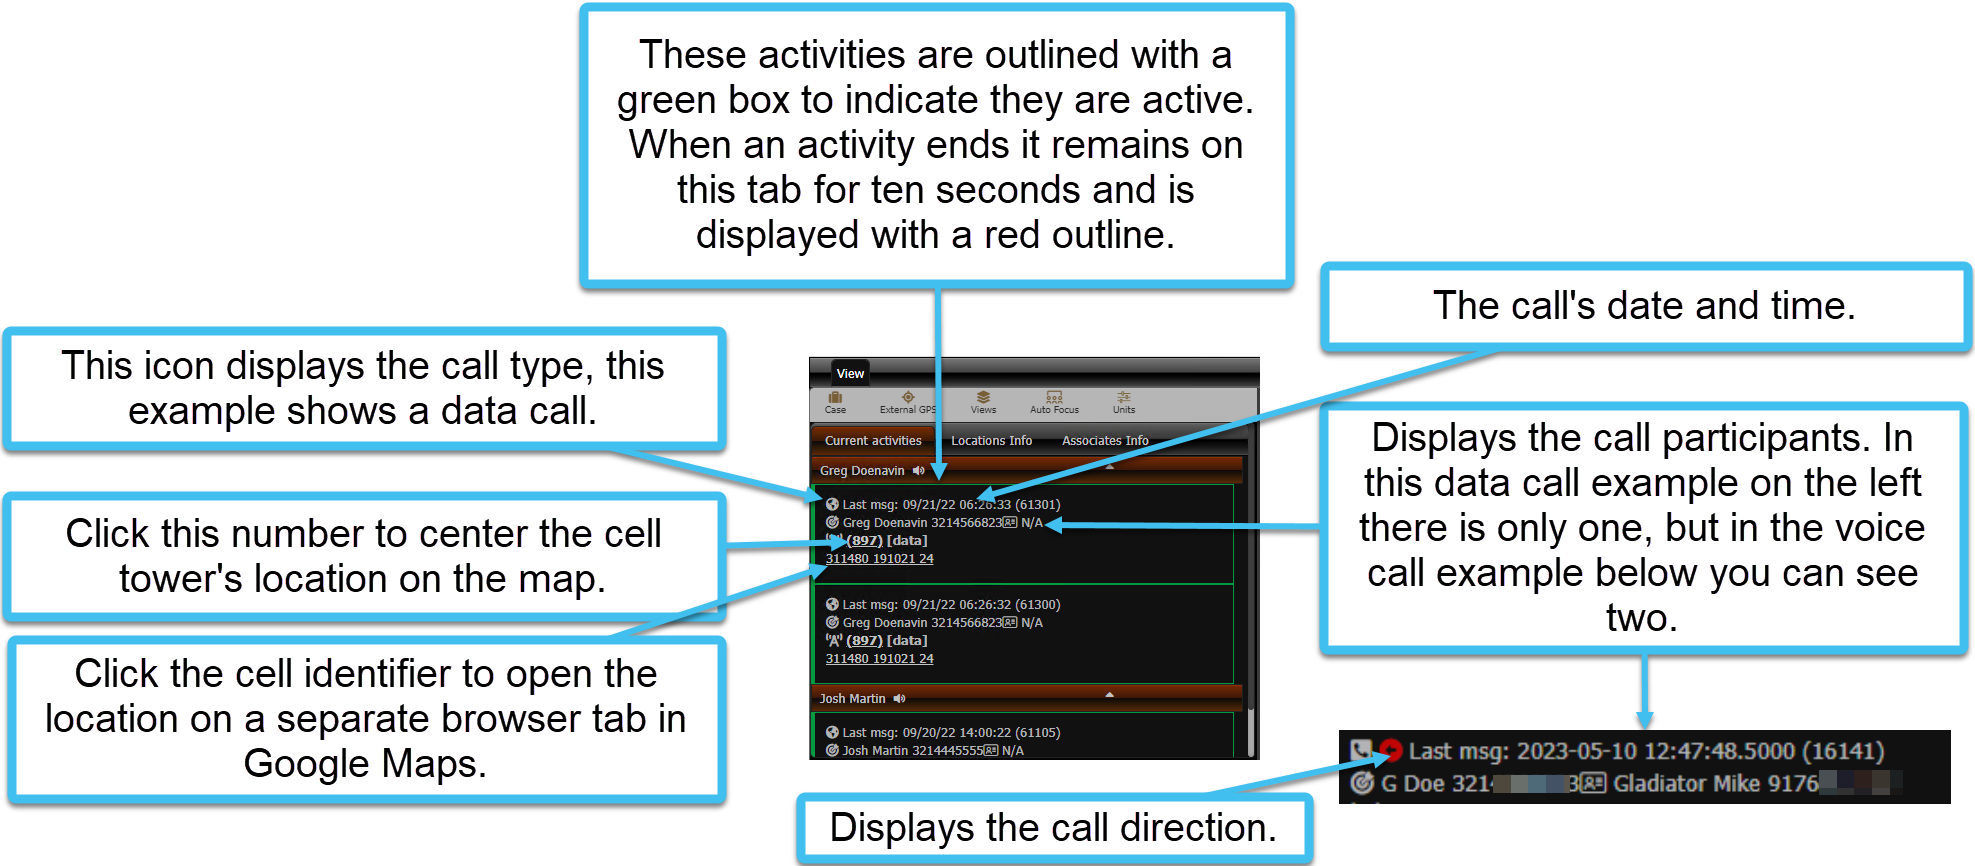
Current activities: displays the details of any current communication activities. Typically these activities are outlined with a green box to indicate they are active. When an activity ends it remains on this tab for ten seconds and is displayed with a red outline. You can click the tower reference number to center the cell tower's location on the map. To investigate the location further you can click the cell identifier to open the location on a separate browser tab in Google Maps.
-
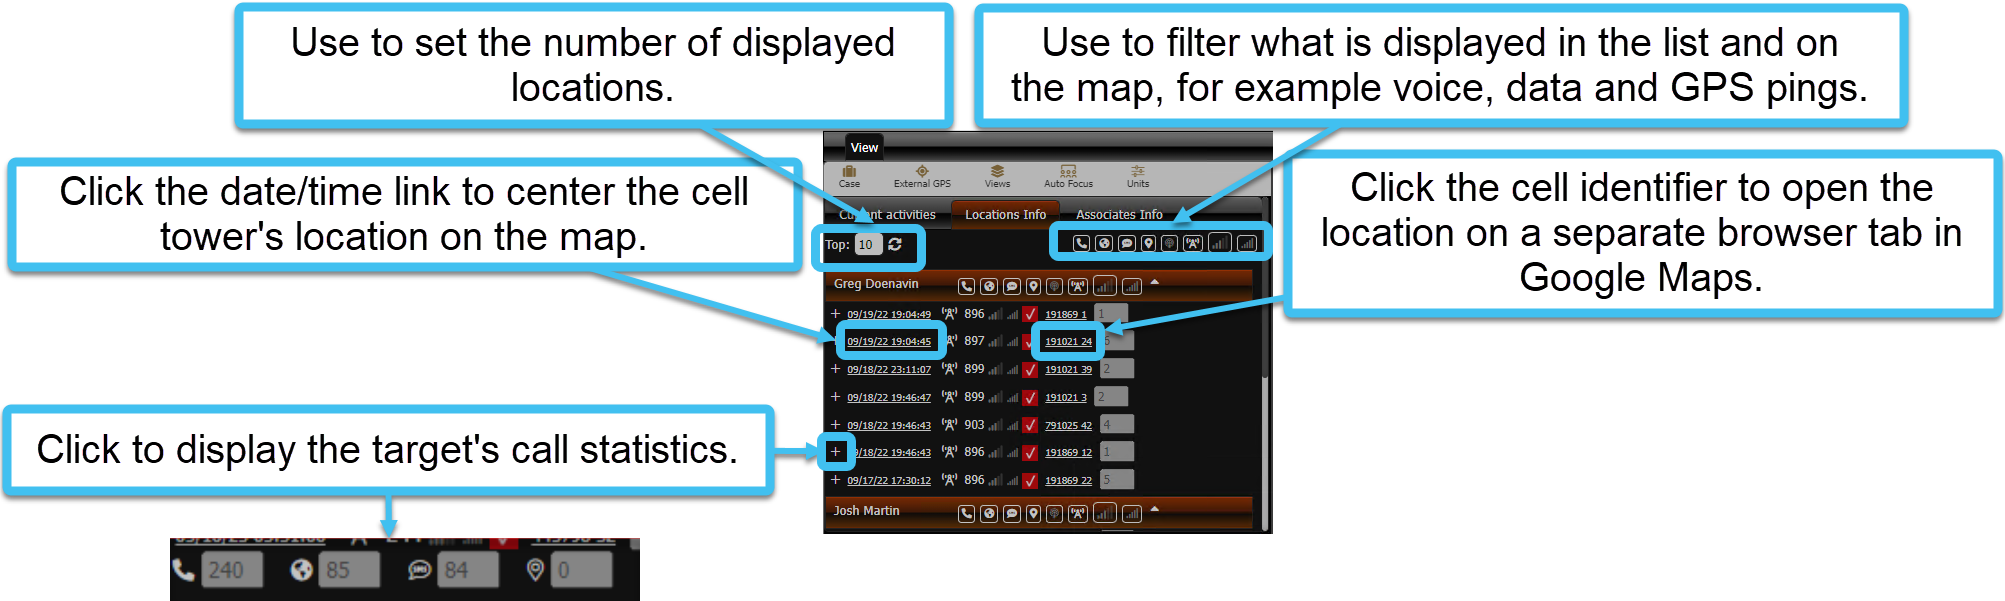
Locations Info: displays by default the details of the last ten locations for communications. You can change the number of locations from the default of ten using Top and clicking the refresh icon.
You can click the date/time link to center the cell tower's location on the map. To investigate the location further you can click the cell identifier to open the location on a separate browser tab in Google Maps.
Click + to display the target's call statistics. You can use the icons to filter what is displayed in the list and on map. You can filter on voice and VoIP calls, data calls, SMS and MMS calls, GPS pings, GPS buffer, tower, cell coverage and the dominant cell coverage.
The icons at the top of the tab apply to all persons listed on the tab but you can also use the icons alongside each person's name. For the map details you can also click the icons listed for each location to display or hide them from the map.
-
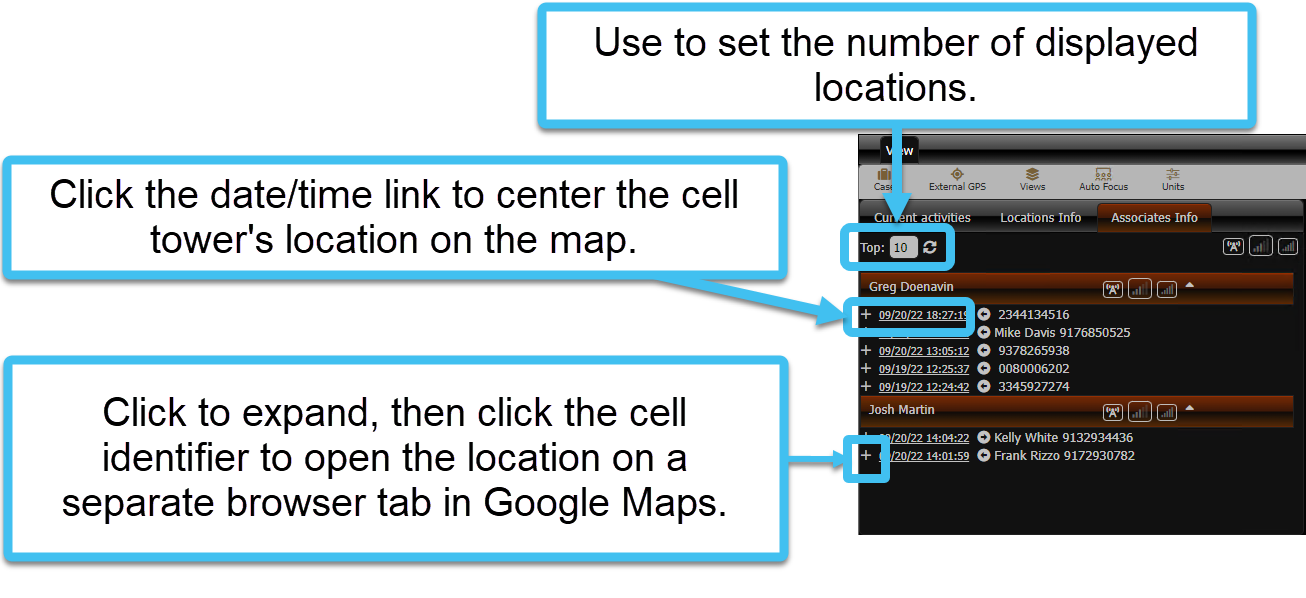
Associates Info: displays by default the details of the last ten associates the target last communicated with, and the target's location during that communication. You can change the number of associates from the default of ten using Top and clicking the refresh icon.
You can click the date/time link to center the cell tower's location on the map. To investigate the location further you can click the cell identifier to open the location on a separate browser tab in Google Maps. The arrow alongside the associate's name indicates if the call was incoming or outgoing.
-
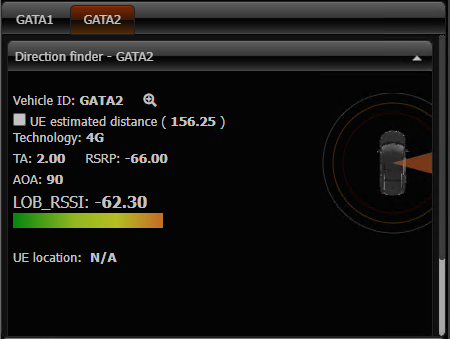
Field unit: for each GATA field unit that is active a tab is displayed. It displays information gathered from the GATA field units which can help you find devices of interest. Each field unit tab is named using the field unit's name. Currently the only field unit feature implemented is the Direction finder pop-up.
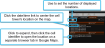
You can minimize this tab by clicking
 at the top-right of the tab.
-
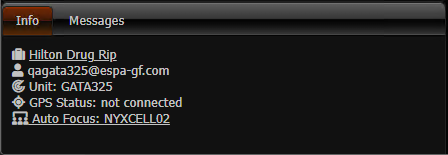
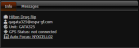
Info: displays the case name that you are viewing and the name of the user that you are logged in as, both of which are set on the Case Settings dialog box. It also displays your field unit name and your GPS status.
If the case has map data exported from the OSS-ESPA's Analysis center then a link is provided which opens the Case data - Exported from Analysis Center dialog box which allows you to view the available map exports and select any that you would like to display on the GATA map.
-
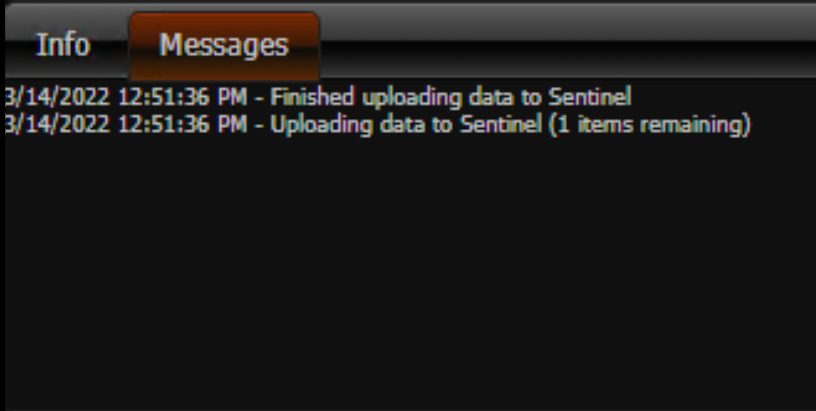
Messages: displays information regarding the status of uploading data to Sentinel.

-
Case: click to open the Case Settings dialog box which allows you to sign into your OSS-ESPA account and select which of your intercepts you want to view.
-
External GPS: click to open the Read GPS from external device dialog box which allows you to give GATA access to your current location when you do not have a GAR unit or an Over-The-Air unit.
-
Views: click to open the GATA Views dialog box which allows you to define which views you want displayed on the GATA field unit tabs.
-
Auto focus: click to open the Auto focus dialog box which allows you to set whether or not the map automatically centers a new event on the map when it arrives.
-
Units: click to open the Field units dialog box which allows you to open the Field unit color dialog box and the Unit settings dialog box which allow you to select how the field units and their data are displayed on your map.