Monitoring movement on the Map View
This topic describes how to use the Map View to monitor the ongoing communications and movement of a target device. Prior to monitoring a target device you must have created a case in OSS-ESPA.
-
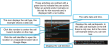
On the Map View, click
 on the left of the map.
 The GATA panel opens.
-
Click
 .
.
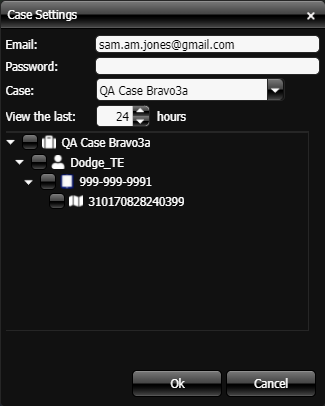
The Case Settings dialog box opens.

-
On the Case settings dialog box:
-
If this is the first time you have signed in, or another user is currently signed in, then in Email and Password you must enter your OSS-ESPA account details, then click OK.
-
The software is reloaded and on returning to this dialog box your cases are automatically listed in Cases.
-
In Case, select the case you want to monitor. You can either select your case from the drop-down list or start typing the case name to display it.
-
In View the last, enter the time period over which you want to view the active and historical trails, and the active calls.
-
In the list of people and phones, ensure all the CASEIDs (LIIDs) (lawful interception identifiers) you want to monitor are selected.
-
Click OK.
The software is reloaded and synchronizes the case data with OSS-ESPA.
-
-
The map now displays active and historical trails, and active calls for the time period you selected. You can now monitor the movements of the target device on the map as new communications arrive, and view the field unit trails of yourself and your colleagues.
-
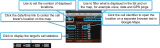
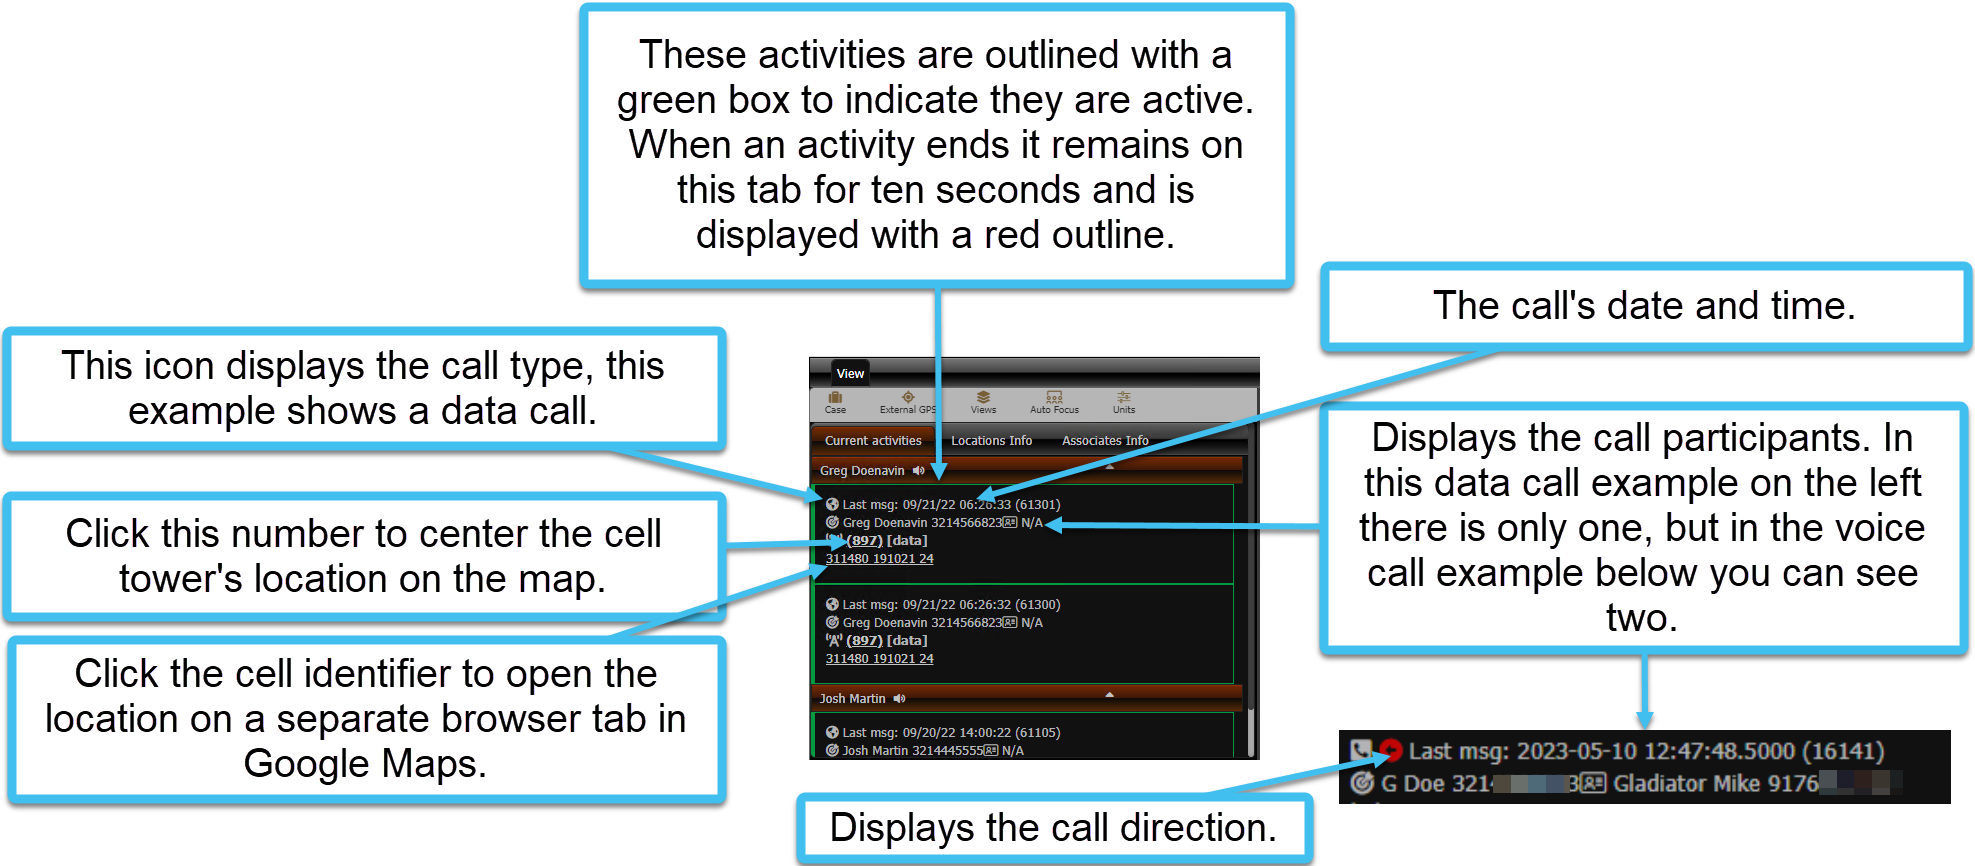
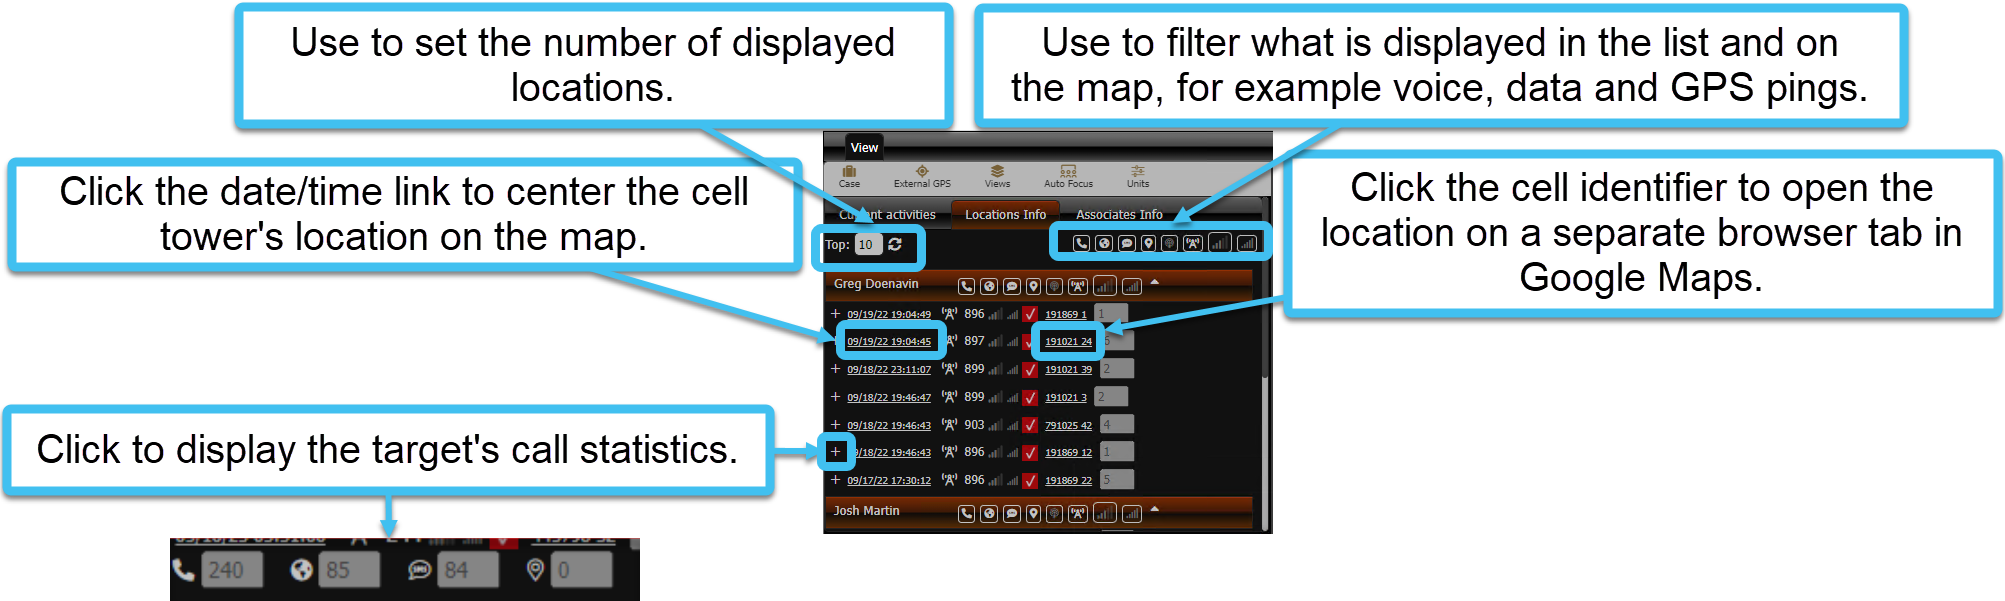
All active calls are listed on the Current activities tab. Typically these activities are outlined with a green box to indicate they are active. When an activity ends it remains on this tab for ten seconds and is displayed with a red outline. You can click the tower reference number to center the cell tower's location on the map. To investigate the location further you can click the cell identifier to open the location on a separate browser tab in Google Maps.
-
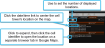
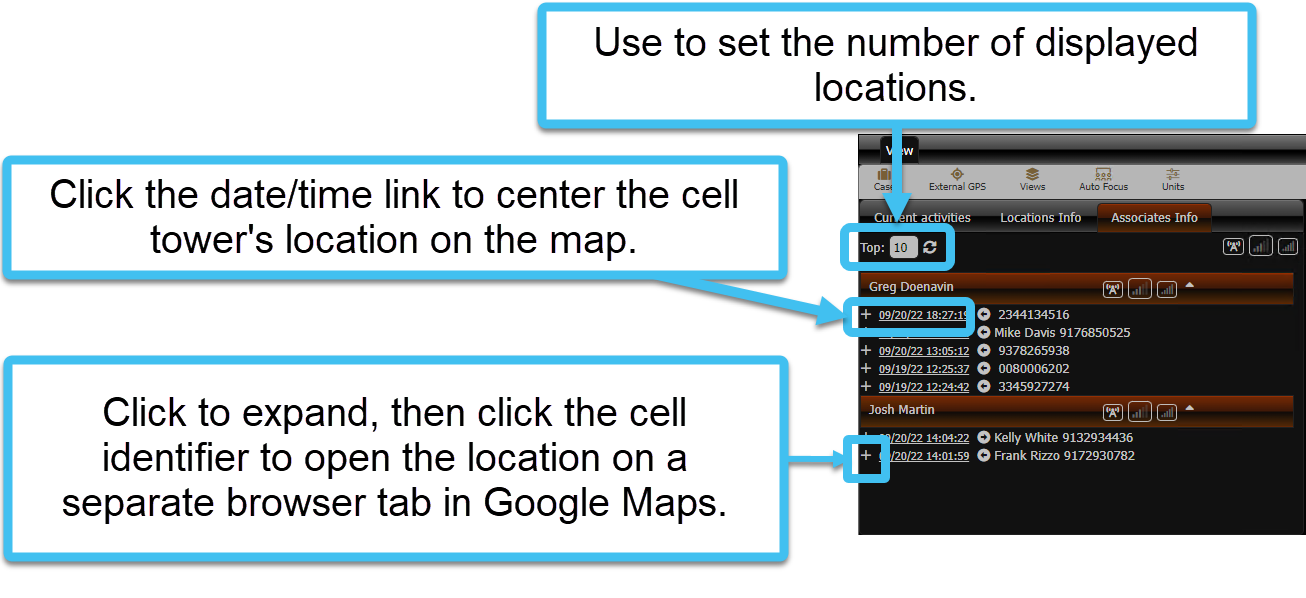
The ten last known associates and locations are listed on the Associates Info and Locations Info tabs. You can click the date/time link to center the cell tower's location on the map. To investigate the location further you can click the cell identifier to open the location on a separate browser tab in Google Maps. You can use the icons on these tabs to filter what is displayed. For example, you can display all used sectors, GPS ping locations and cell coverage on the map
Locations Info tab:
Associates Info tab:
-
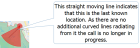
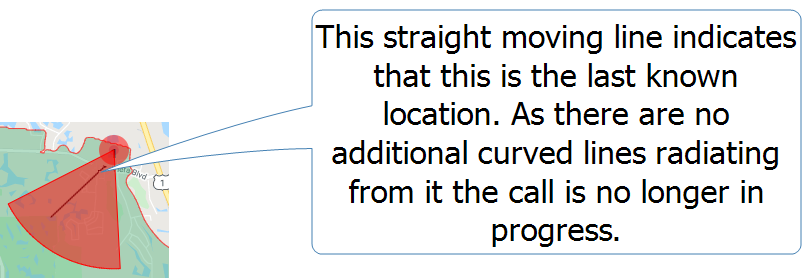
The person's last known call location is marked with a moving straight line. If the most recent location is a sector with no azimuth defined then this straight line is displayed moving over 360 degrees. The last known GPS ping location is displayed as a circle with radiating lines above and below.
-
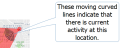
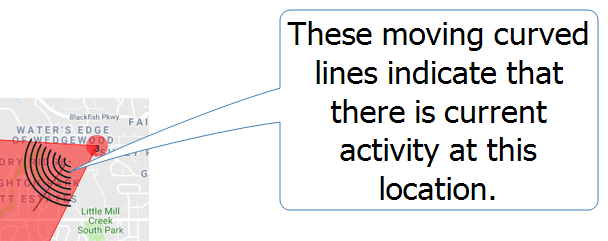
The person's current activities are marked with moving curved lines. If the current activity locations is a sector with no azimuth defined then these curved lines are displayed over 360 degrees.
Current activities are defined as:
-
a call or data session in progress. Note, that the map displays all the sectors that have been used during the call, not just the call's latest sector. The sector that is currently being used is displayed with moving curved lines, whereas the previous sectors show no moving curved lines.
-
an SMS that occurred in the previous 60 seconds.
-
GPS pings that occurred in the previous 60 seconds.
-
-
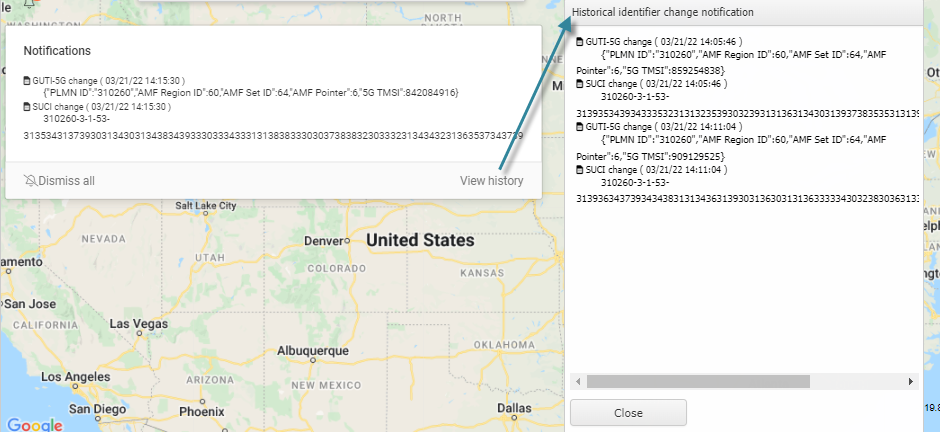
A
 notification appears automatically if there is any change to a device's subscriber information (IMSI, MSISDN, SUPI-IMSI, GPSI-MSISDN, SUCI, GUTI-5G) and the device information (IMEI, IMEISV, PEI-IMEI, PEI-IMEISV). This type of alert notifies you of pertinent changes related to the target device which may require you to reconfigure other mission equipment in order to accomplish your mission.
The subscriber information can change when the target changes the SIM card or any temporary identifier related to the SIM card managed by the operator. The most current IMSI, GUTI or SUCI (5G) number is required if you want to locate the phone with cell tracking equipment.
The device information is related to the phone model or device in use with the subscriber identifier, and is required to configure the cell tracking equipment with regards to the device's supported technologies and limitations.
When you click the notification, it opens the Notifications pop-up which displays the most recent changes. Click View history if you want to view any previous changes. Click Dismiss all to remove the alert notification from the screen and to also clear the historical alarms.
-
-
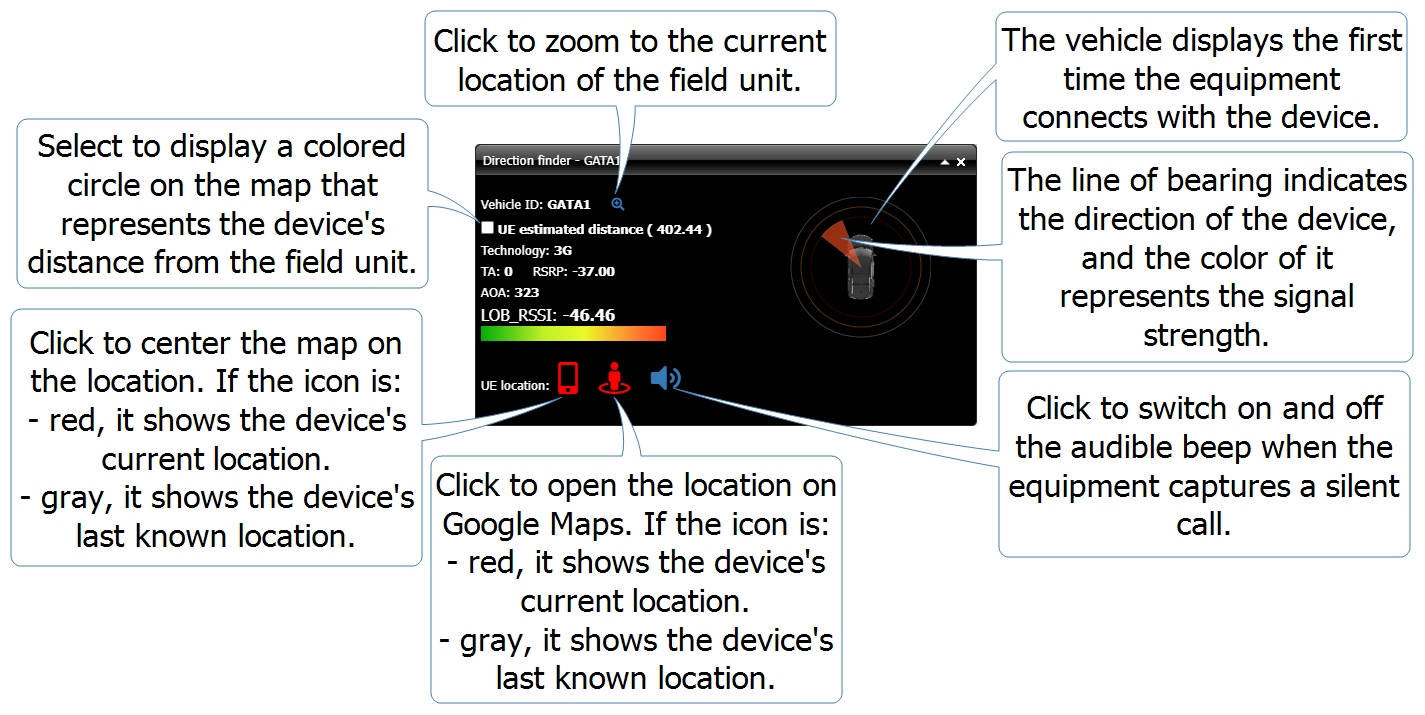
If you have field units with GATA equipment installed then you can also use them to help locate a device using the Direction finder pop-up. For the GATA field units that are currently active, a Direction finder pop-up is either displayed in the field unit's tab or as a floating window.
If the Direction finder pop-up does not display then click
 . On the GATA Views dialog box, ensure that in GATA , Direction finder is selected.
The following graphic explains how to use the Direction finder pop-up to help locate a device.

-
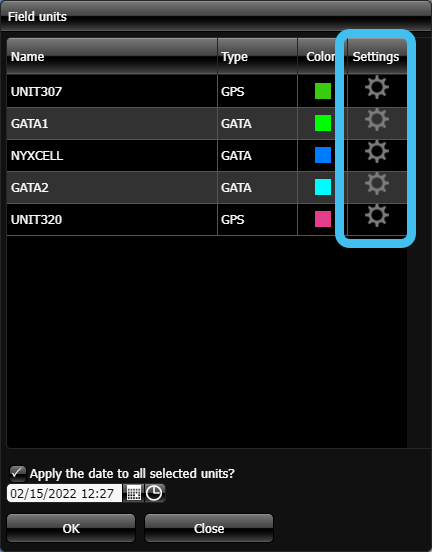
If required you can change how the field units appear on the map, such as displaying the route's signal color and the appearance of the Direction finder pop-up. Any changes you make to a field unit's settings will also change for all GATA and OSS-ESPA users, and in all cases. To change a field unit's appearance:
-
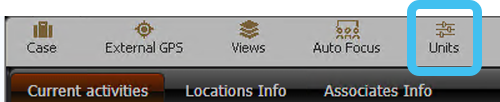
Click
 .
.
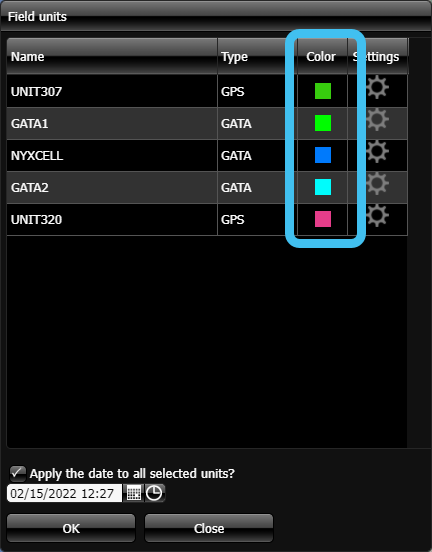
The Field units dialog box opens.
-
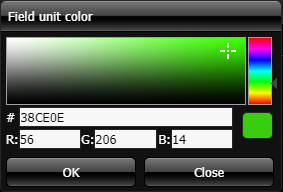
If you want to set the color the field unit's marker and trails are displayed in, click the color icon.

The Field unit color dialog opens, select a new color then click OK.

-
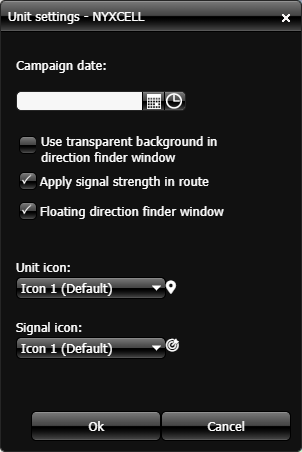
If you want to configure any other settings associated with a field unit, such as using a transparent background in the direction finder window, using a floating direction finder window, displaying the signal strength in the bread crumb trail and the appearance of the unit and signal icons, then click
 .
. 
The Unit settings dialog box opens. Configure the settings as required then click OK. For further information on the settings refer to Unit settings dialog box.

-
Click OK to close the Field units dialog box.
-

There are a number of additional tasks you may want to consider whilst using the GATA map: